
- Assumption:
- I’m assuming that y’all have some basic knowledge about Graphql & Django.
- If not then kindly go through below link:
- Graphql: https://graphql.org/learn/
- Django:https://www.djangoproject.com/
- Introduction
- GraphQL is an open-source query language used to communicate data between the client and the server.
- In this document our focus will be on integrating a GraphQL API into a Django project and effectively using it to query data as per our requirements.
ALWAYS FIRST STEP IS TO Set environment:
- Create Virtual Environment
- Enter the following command to create a new virtual environment with the name “myenv” (you can replace “myenv” with a your environment name):
- python -m venv myenv
- Enter the following command to create a new virtual environment with the name “myenv” (you can replace “myenv” with a your environment name):
- Once the virtual environment is created, you can activate it by entering the following command.
- source myenv/bin/activate
- Installation [ Django & Graphene-django ]
- First install django
- pip install django
- Then install graphene-django library
- pip install graphene-django
- First install django
- Check requirements & freeze it into relevant file.
- Run command to freeze your requirements.txt file:-
- pip freeze > requirements.txt
- It will create requirements.txt file with all installed packages directory
- Your requirements.txt look like as below:
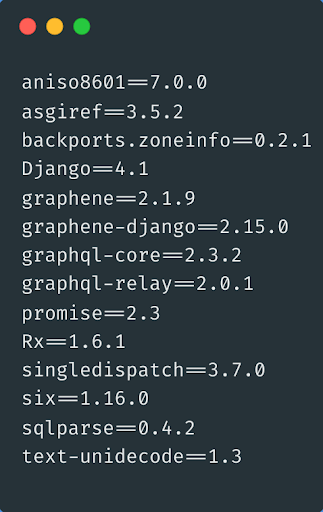
- Create django development project and relevant app in your project and configure with settings.py
- Create models in model.py for the project in your app.
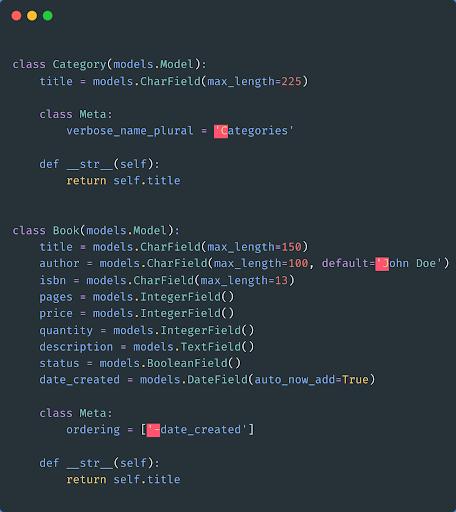
- In the above image we create two models Class Category and Book. and added fields for the model Classes.
- In the Book model we have added ‘-date_created’ in Meta class for orders according to the date they were created at.
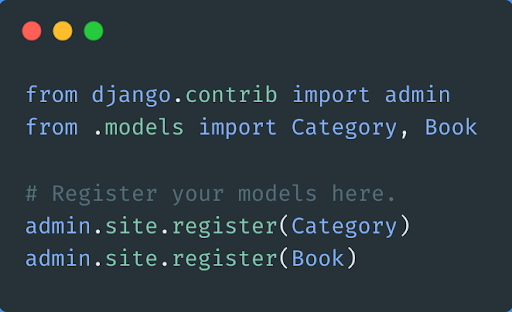
Let’s register models in the app/admin.py file
- Now run migrations to add our model in the database.
- python manage.py makemigrations
- python manage.py migrate
- Once migration is done, run python manage.py runserver if the app is displayed on your browser, then you are on the right track.
Integrating GraphQL into our project
- We will integrate GraphQL into our Django project.
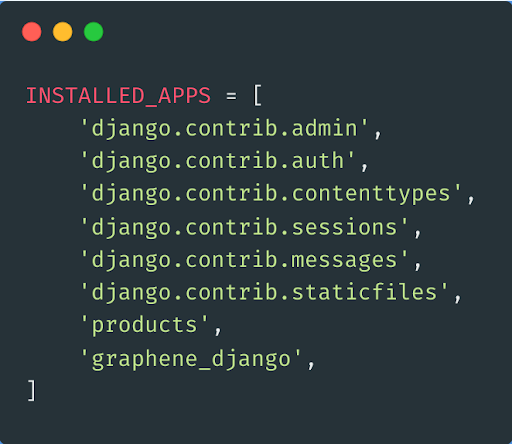
- Now, Add graphene_django to INSTALLED_APPS in your settings.py file.
Create schema
- GraphQL is a query language with a powerful type system that can be used to define an API’s data structures. The GraphQL Schema is used to represent this information.
- A schema is a contract between the client and the server that describes how the client can acquire the database.
- You’ll need to add a Schema, Object Type and view function that receives the GraphQL queries to be able to perform GraphQL queries in your web application.
- Let’s define our schema in the app directory. We’ll create a file called schema.py.
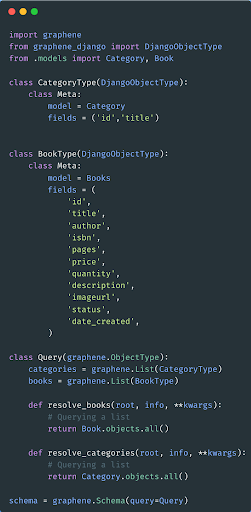
- Add above image code in schema.py file.
- We create schema for our two models (book and category). CategoryType and BookType is schema.
- We also included DjangoObjectType: which uses GraphQL to display all fields on a model.
- In ‘graphene.List’ List is object type we can use (nonNull, String, Enum)
- class Query: inherits from ‘graphene.ObjectType’ and provides the setting for our graphql queries.
- resolve_category , resolve_books are used to open up categories, books querysets. These methods take two parameters (root and info).
- graphene.Schema: this query brings in data from our type(database).
Add GraphQL to URL
- The only endpoint/API accessible to the client while working with GraphQL is /graphql. This is the only endpoint where clients can send requests and change data. In comparison to REST, we have fewer endpoints to manage.
- Add graphql url in project’s urls.py file.
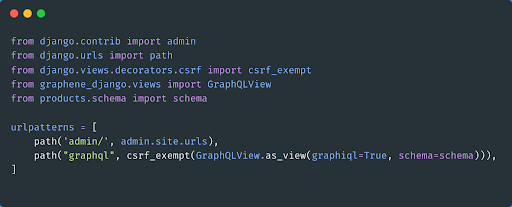
- The url contains our endpoint, where our GraphQL communications will be made.
- We imported GraphQLView which is a unique view provided by graphene_django which will be executed when GraphQL url is called.
- We added a url called “ graphql ”. Then we set graphiql=True which will enable us to use graphiql (GraphQL IDE).
Testing our Graphql API
- We will test our API to make sure it’s running successfully. To do this let’s simply run python manage.py runserver.
- URL:- http://127.0.0.1:8000/graphql [ for local server it will be http://127.0.0.1:8000/ ]
- You can see the same ui in the image below.

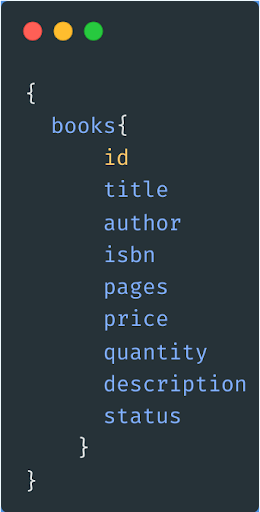
- Add this code in your left IDE in your screen. And press the play button to execute the query.
- You can see output on the right screen.
- If there is an error it also shows on the right screen.
- When you write a query in the left display you get suggestions of class, fields, parameters.
- Note: you can add data manually in the admin panel by creating superuser.
Adding Mutations
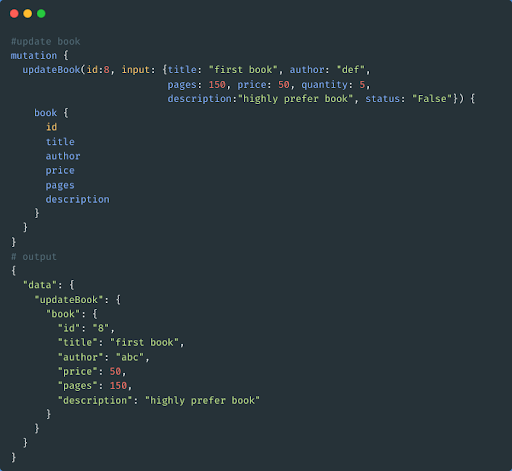
- In GraphQL, a mutation is used when adding, updating, and deleting data. It performs a similar function to the POST, DELETE and PUT method in REST API.
- Category create and update
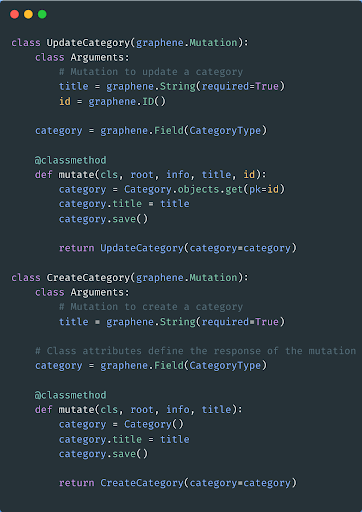
- Book create and update
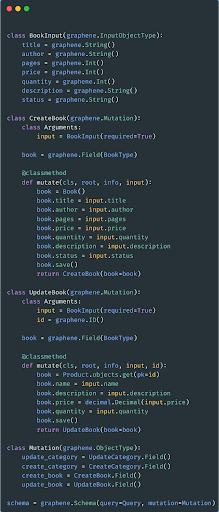
- Add above code in your schema.py
- We create classes to add and update data to our models.
- ‘Class arguments’ allows us to define parameters to save data to the database.
- ‘Class Mutation’ defines our mutations and sends parameters such as updating and creating data to the model.
- Lastly, we updated our schema by adding mutation to the Schema constructor.
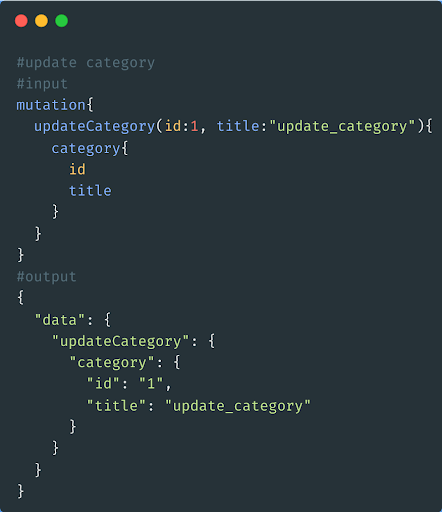
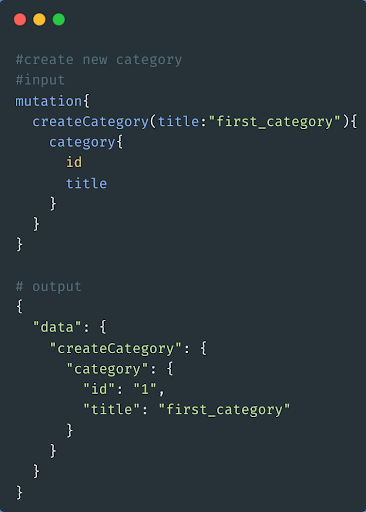
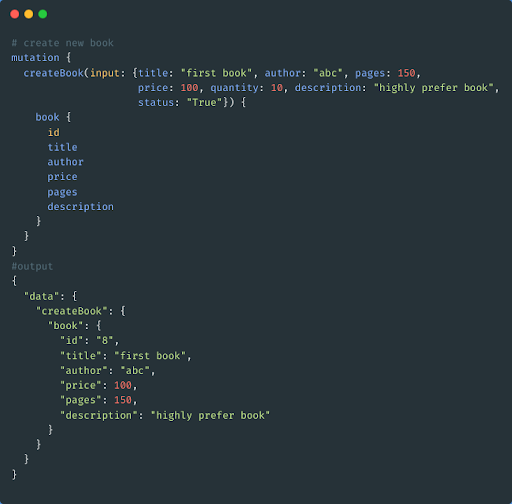
You can perform below query in web page
Conclusion:
In conclusion, Django and GraphQL are a powerful combination that can provide developers with a flexible and efficient way to build APIs. While Django provides a robust and scalable backend framework, GraphQL offers a query language that allows for more efficient and precise data retrieval.
By implementing GraphQL in a Django project, developers can take advantage of features such as declarative data fetching, schema introspection, and type validation, among others. This can lead to faster and more reliable development, as well as better performance and user experience.
Overall, the combination of Django and GraphQL offers a great solution for developers who want to build robust and efficient APIs. By leveraging the strengths of both technologies, developers can create applications that are not only scalable and maintainable but also provide a great user experience.


